
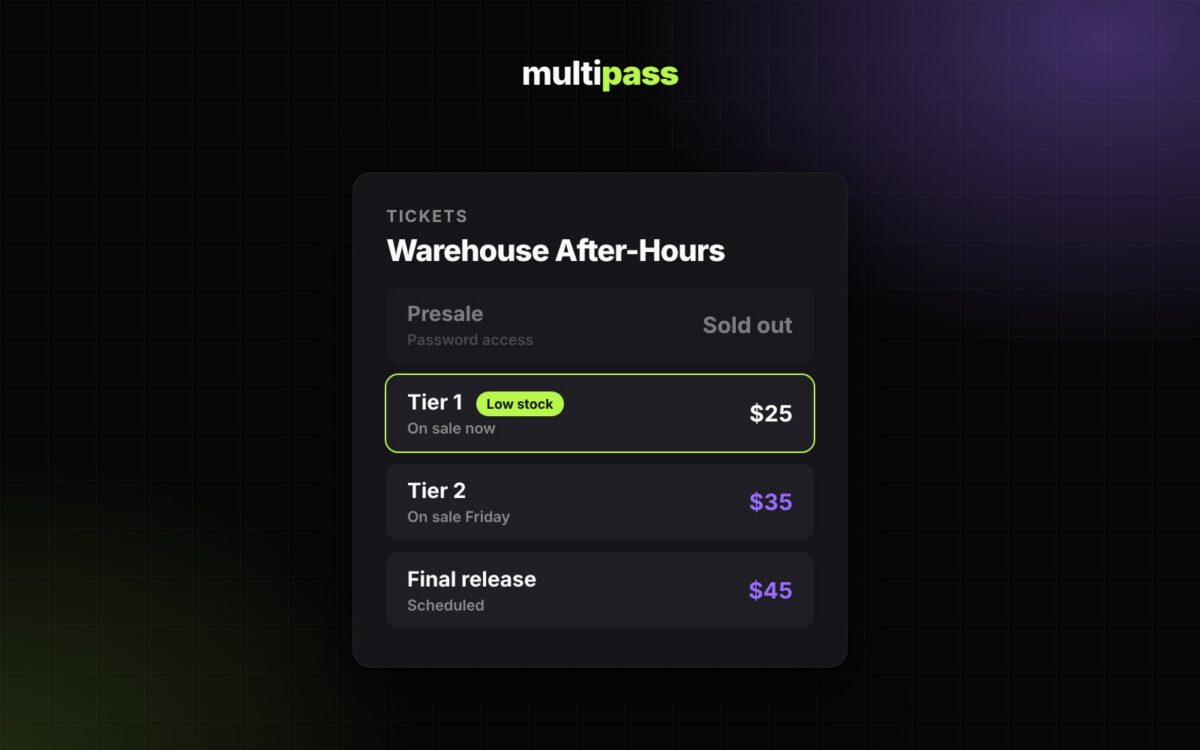
Raves and after-hours run on a different clock. Crowds decide late, lineups drop in waves, the location is sometimes a secret until the day of, and the door has to move fast at 2am. The organizers who sell out again and again treat ticketing as a system, not a single flyer. Here is a practical playbook for each stage, from the first announcement to the next event.
1. Build your list before you announce
Most tickets for a rave sell to people who already know you. Before tickets go on sale, collect the people who want in: past attendees, followers on your socials and your crew’s friends. Give them a reason to sign up early, such as first access to the cheapest tier.
- Let people follow your organization page so new events reach them by email.
- Import an existing list of followers you already have permission to contact.
- For a high-demand night, open an interest list with a few questions, then invite people off the list with a single-use code.
- When the event is ready, use Announce to send a one-time new-event email to your followers and members. It also lets your standing promoters know the event is live.
Learn more: Memberships & Followers · Interest Lists, Lotteries & Curated Events · Marketing: Email, Text & Tracking
2. Open with a presale drop
A presale rewards your core crowd and gives you an early read on demand. Keep it short, keep it exclusive and make the price worth it.
- Set a Presale Start and Presale Password on a ticket type. Buyers who enter the password can buy before general sale; everyone else sees “Presale”.
- Send the password only to your list, so signing up early actually pays off.
- Cap the presale quantity so it can sell out. A sold-out presale is your best announcement for the next tier.
Learn more: Ticket Types & Pricing
3. Price in tiers and say when they move
Tiered pricing is standard for electronic events: early buyers pay less, and each price step gives undecided people a deadline. It only works if the tiers are real and clearly communicated.
- Create one ticket type per tier with its own price, quantity and On Sale After / On Sale Until dates, so each release opens and closes on schedule.
- Use the low stock alert so buyers see a scarcity notice when a tier is nearly gone.
- Keep a hidden ticket type for DJs’ guests or crew deals, unlocked with an access code instead of a public discount.
- Announce each tier change on socials the day it happens. Every price step is a reason to post.
Learn more: Ticket Types & Pricing · Promo Codes, Comps & Guest Lists
4. Give promoters and channels their own links
A lineup alone rarely fills a room. Street teams, collectives and resident DJs do, as long as they have a reason to push and you can see what each one brings in.
- Invite promoters with a commission (a percentage or a payout profile). Each gets a personal link and QR code, and sales through it are credited to them automatically.
- Create tracking links for each channel (an Instagram story, a group chat, a partner’s newsletter) so you know which ones sell.
- Add UTM tags to links you share and watch the funnel in Analytics: views, added to cart, started checkout, paid.
Learn more: Promoters & Revenue Sharing · Promoters & Street Teams · Reports & Analytics
5. Plan the final push and the location drop
After-hours crowds buy late. The final week, and often the final day, is when the most undecided people make up their minds. Plan that push from the start instead of improvising it.
- Schedule a final release tier and post set times or a lineup reveal in the last week.
- Use Send Email to reach everyone holding a ticket with venue and time details. It is built for changes like this, so it reaches holders even if they have opted out of marketing email.
- Text ticket holders on the day with your own Twilio account connected.
- Watch the Analytics funnel for the drop between started checkout and paid, and aim your last posts at the people still deciding.
Learn more: Marketing: Email, Text & Tracking
6. Run a fast door
A long line at 1am costs you drinks, energy and reviews. Set the door up before the night, not during it.
- Give door staff the scan permission and use the Multipass mobile app to scan tickets, or check people in by name with Web Check In on a tablet.
- Put DJ guests and crew on the guest list with a note door staff can see, and issue comps that arrive like a real order.
- Turn on door sales and choose your tenders (including a Stripe card reader) if you sell at the door, and mark which ticket types can be sold there.
- If your venue needs one, require a waiver signature that the app captures at scan time.
- Follow your venue’s ID and age rules at the door and brief staff before doors open.
Learn more: Check-In, Scanning & Door Sales · Promo Codes, Comps & Guest Lists
7. Keep the crowd for next time
The night ends at sunrise; the relationship should not. Everyone who bought a ticket is the warmest audience for your next event.
- Invite attendees to follow your page so your next announcement reaches them.
- Use an org-wide promo code that works across every event for your regulars.
- Review Sales Breakdown and your promoter reports to see which tiers, links and promoters worked, and plan the next lineup around it.
Learn more: Reports & Analytics · Promo Codes, Comps & Guest Lists
What it costs
Organizers keep 100% of their ticket price, with instant payouts. Attendees pay a 5% + $1.50 service fee per ticket by default, and you can choose to absorb it instead. Free events are free, and there is no subscription, monthly fee or contract.
Learn more: Stripe, Payouts, Fees & Sales Tax
Ready for your next night?
Sell tickets, pay your promo team and move the line fast, all from one dashboard.